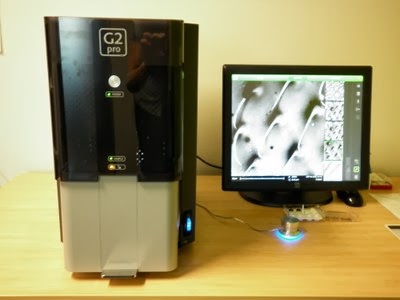
How To Work The SEM (FEI Phenom Pro)
-Making The Stub
1. Take carbon tape and put it on the stub. Then pull off stub from the carbon tape.2. Have samples ready. Divide stub into "fours". Using tweezers.
3. Using a clean watercolor paint brush take pollen off and dab it in between the markings on the carbon tape. The plants we used were Poinsettia (Euphorbia Pulcherrima), Christmas Cactus (Schlumbergera), and Deodar Cedar (Cedrus Deodara). And we gathered the pollen from Ms.Linahl.
4. Then blow off the sample with compressed air. Start at a foot and a half, then get as close as two inches. Blow in circular motion.
-Putting Stub Into SEM (FEI Phenom Pro)
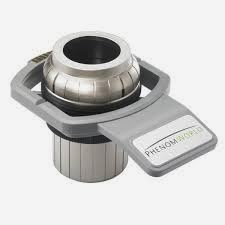
1. Take cup for the SEM and place sample in the cup as straight as possible.
2. Spin the top of the cup so it is flushed (disappeared). Turn clockwise (to left). Spin counterclockwise (to right) four times (slowly).
3. Push cup into the machine until it won't go back anymore. Wait until the green light comes on. Push door down.
-Working On The SEM (FEI Phenom Pro)
1. Press the "maze" button to mapout sample.
.jpg&container=blogger&gadget=a&rewriteMime=image%2F*) 2. Go to settings and label sample as "plant name, period number, and first initials of groups names". Press "OK". Then click image.
2. Go to settings and label sample as "plant name, period number, and first initials of groups names". Press "OK". Then click image.3. The "+" plus button creates the vacuum.
4. To move around, touch screen with finger.
5. To focus: click "A" for auto focus (may need to press this many times)
6. To contrast: click "contrast" button above the "A".
7. To zoom: use the nob and use "A"
8. To take pictures click the "camera" button.
9. To measure the pictures: click on the photo you want to measure.
10. Click the ruler button. Click where you want the ruler to go. The click "save".
11. When completely satisfied, push the eject button. Then "confirm" you want to eject. Wait for the green light to come on. Once on, open door and remove cup gently.
12. Twist cup all the way up to grab the sample. Put sample in the holder. And put cup on top of the SEM.
13. Enjoy your pictures.
No comments:
Post a Comment