The three plant species we are using for this experiment are the Deodar Cedar (Cedrus deodara), the Poinsettia (Euphorbia pulcherrima), and the Christmas Cactus (Schlumbergera truncata). Of the three, the Cedar is a gymnosperm and the Poinsettia and Christmas Cactus are angiosperms. This means that while the Poinsettia and the Cactus produce flowers to help spread their pollen by attracting pollinators, the Cedar must rely solely on wind to spread its pollen.
The Deodar Cedar is a large evergreen tree native to the western Himalayas. Like other gymnosperms, it uses male and female cones to produce and receive pollen, respectively. The majority of its pollen is produced in the fall.
Link
The Ponsettia is a small house plant, originally from Mexico and South America. It has bright colored leaves that surround its flowers, which are often mistaken for petals. These leaves are commonly bright red, but can also be orange, pink, white, green, or marbled. It has small flowers in the center of each ring of leaves.
Link
The Christmas Cactus is a mountain dwelling plant from south-eastern Brazil. It thrives is high humidity and requires only rocks or other plants to grow on top of. It has long, flattened stems which end in small, brightly colored flowers that come in pink, red, orange, yellow, white, and purple.
Link
Thursday, January 16, 2014
Friday, January 10, 2014
Experimental Conclusion/Analysis
Our experiment shows that our original hypothesis, that gymnosperm pollen would be smaller than angiosperm pollen, was incorrect. By analyzing our S.E.M. photos, we see that the pollen of the Deodar Cedar is actually much larger than the pollen samples from the Ponsettia and the Christmas Cactus. The Cedar's pollen measured 63.5 micrometers, while the Ponsettia's measured 52.0 micrometers and the Christmas Cactus's measured 52.2 micrometers. Additionally, by looking at pollen morphology and genetic sequencing, we see that the Ponsettia and the Christmas Cactus are more closely related with each other than with the Cedar. These two phylogenetic trees compliment each other, and they are both supported by the fact that both the Ponsettia and the Christmas Cactus are angiosperms, with developed later than the Cedar, which is a gymnosperm.
Analysis Of Phylogenetic Tree
Pollen Sequence Phylogeny

Neighbor Joining Tree: rbcL Protein
This is a protein tree sequence that shows different results than the second tree we made. This tree shows the Deodar Cedar tree and the Poinsettia are more closely related than the Christmas Cactus to the Poinsettia. This tree wasn't very trust worthy because the distances are very far apart. We made another tree to see if the differences were going to be the same or different.
Analysis Of Phylogenetic Trees
Pollen Sequence Phylogeny
Neighbor Joining Tree: MatK Protein

This is a pollen sequence tree that actually agrees with the first tree we made. This shows that the Cedrus Deodara (Deodar Cedar) is not related to the Poinsettia or the Christmas Cactus. We thought that from our previous tree that the Deodar Cedar and the Christmas Cactus were not really closely related. We made a third tree using rbcL and got completely different results.
Wednesday, January 8, 2014
Original Photos of the 3 studied plants
Christmas Cactus-


Poinsettia-
Deodar Ceder-
http://www.arborday.org/treeguide/treeDetail.cfm?ID=43
Warning When Using SEM
WARNINGS
1. No water, must be dried out completely!
2. Nothing magnetic may be on the SEM!
3. Blow off samples, so lose pollen doesn't get in the SEM
4. Spin down the cup!
5. Be careful when taking out the cup!
All of these things will cost you LOTS of money!
Monday, January 6, 2014
400x Drawings/Photographs
 |
| Deodar Cedar |
400x drawings/photographs
1. We gathered our pollen samples and placed small amounts onto a slide.
2. On the slide we added one drop of 0.1% Bonicacid and 30% Socrose to the pollen's.
3. We did this to see if we could trick the pollen into making pollen tubes.
4. We then placed the samples under the light microscope and located the pollen.
5. We took pictures with our phones (iPhones) of the two samples: Christmas Cactus and Poinsettia
and drew the Deodar Cedar.
.JPG) |
| Christmas Cactus |
35x Photographs

35x Photographs
1.We gathered our three pollen's from Poinsettias, Deodar Cedar, and Christmas Cactus.2. We placed large samples of each into small circular containers and placed them under the Leica EZ4 HD microscope.
3. The microscope was connected to an Apple Macbook Air with the program called Leica image 1.0. Where we were able to see the pollen from the microscope on the laptop.
4. To get clear pictures we moved the magnification to 35x. And we focused the image by using the large black nobs on the sides of the Leica EZ4 HD.
5. Once the image was how we liked it on the Leica image 1.0, we clicked the "capture" button. And then we took the picture.

Procedure
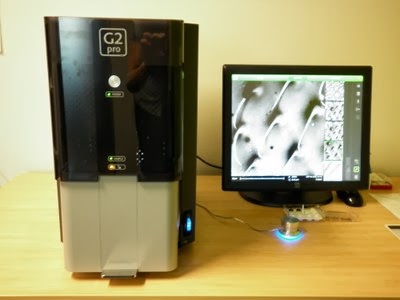
How To Work The SEM (FEI Phenom Pro)
-Making The Stub
1. Take carbon tape and put it on the stub. Then pull off stub from the carbon tape.2. Have samples ready. Divide stub into "fours". Using tweezers.
3. Using a clean watercolor paint brush take pollen off and dab it in between the markings on the carbon tape. The plants we used were Poinsettia (Euphorbia Pulcherrima), Christmas Cactus (Schlumbergera), and Deodar Cedar (Cedrus Deodara). And we gathered the pollen from Ms.Linahl.
4. Then blow off the sample with compressed air. Start at a foot and a half, then get as close as two inches. Blow in circular motion.
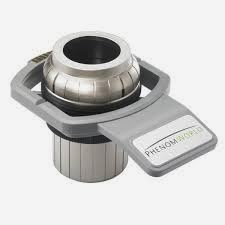
-Putting Stub Into SEM (FEI Phenom Pro)
1. Take cup for the SEM and place sample in the cup as straight as possible.
2. Spin the top of the cup so it is flushed (disappeared). Turn clockwise (to left). Spin counterclockwise (to right) four times (slowly).
3. Push cup into the machine until it won't go back anymore. Wait until the green light comes on. Push door down.
-Working On The SEM (FEI Phenom Pro)
1. Press the "maze" button to mapout sample.
.jpg&container=blogger&gadget=a&rewriteMime=image%2F*) 2. Go to settings and label sample as "plant name, period number, and first initials of groups names". Press "OK". Then click image.
2. Go to settings and label sample as "plant name, period number, and first initials of groups names". Press "OK". Then click image.3. The "+" plus button creates the vacuum.
4. To move around, touch screen with finger.
5. To focus: click "A" for auto focus (may need to press this many times)
6. To contrast: click "contrast" button above the "A".
7. To zoom: use the nob and use "A"
8. To take pictures click the "camera" button.
9. To measure the pictures: click on the photo you want to measure.
10. Click the ruler button. Click where you want the ruler to go. The click "save".
11. When completely satisfied, push the eject button. Then "confirm" you want to eject. Wait for the green light to come on. Once on, open door and remove cup gently.
12. Twist cup all the way up to grab the sample. Put sample in the holder. And put cup on top of the SEM.
13. Enjoy your pictures.
Subscribe to:
Comments (Atom)